Slides
This guide explains how to work with Slides in Norstat Studio – including how to structure your deck, customise charts, apply branding, and create your own Slide Master.
TABLE OF CONTENTS
- About Slides
- Slides overview
- Slide Deck overview
- Slide Settings
- Downloading results
- Slide Master
- When to use Slide Master
- Creating a new Slide Master
- Import your deck from PowerPoint
About Slides
Slides lets you turn your data into ready-to-use PowerPoint presentations directly in Norstat Studio.
Slides are built on the same data, headers, filters, and presets as Tables, ensuring consistency across analysis and reporting.
You can customise charts, layouts, and styling – and reuse AI insights from Summariser where relevant.
Slides overview
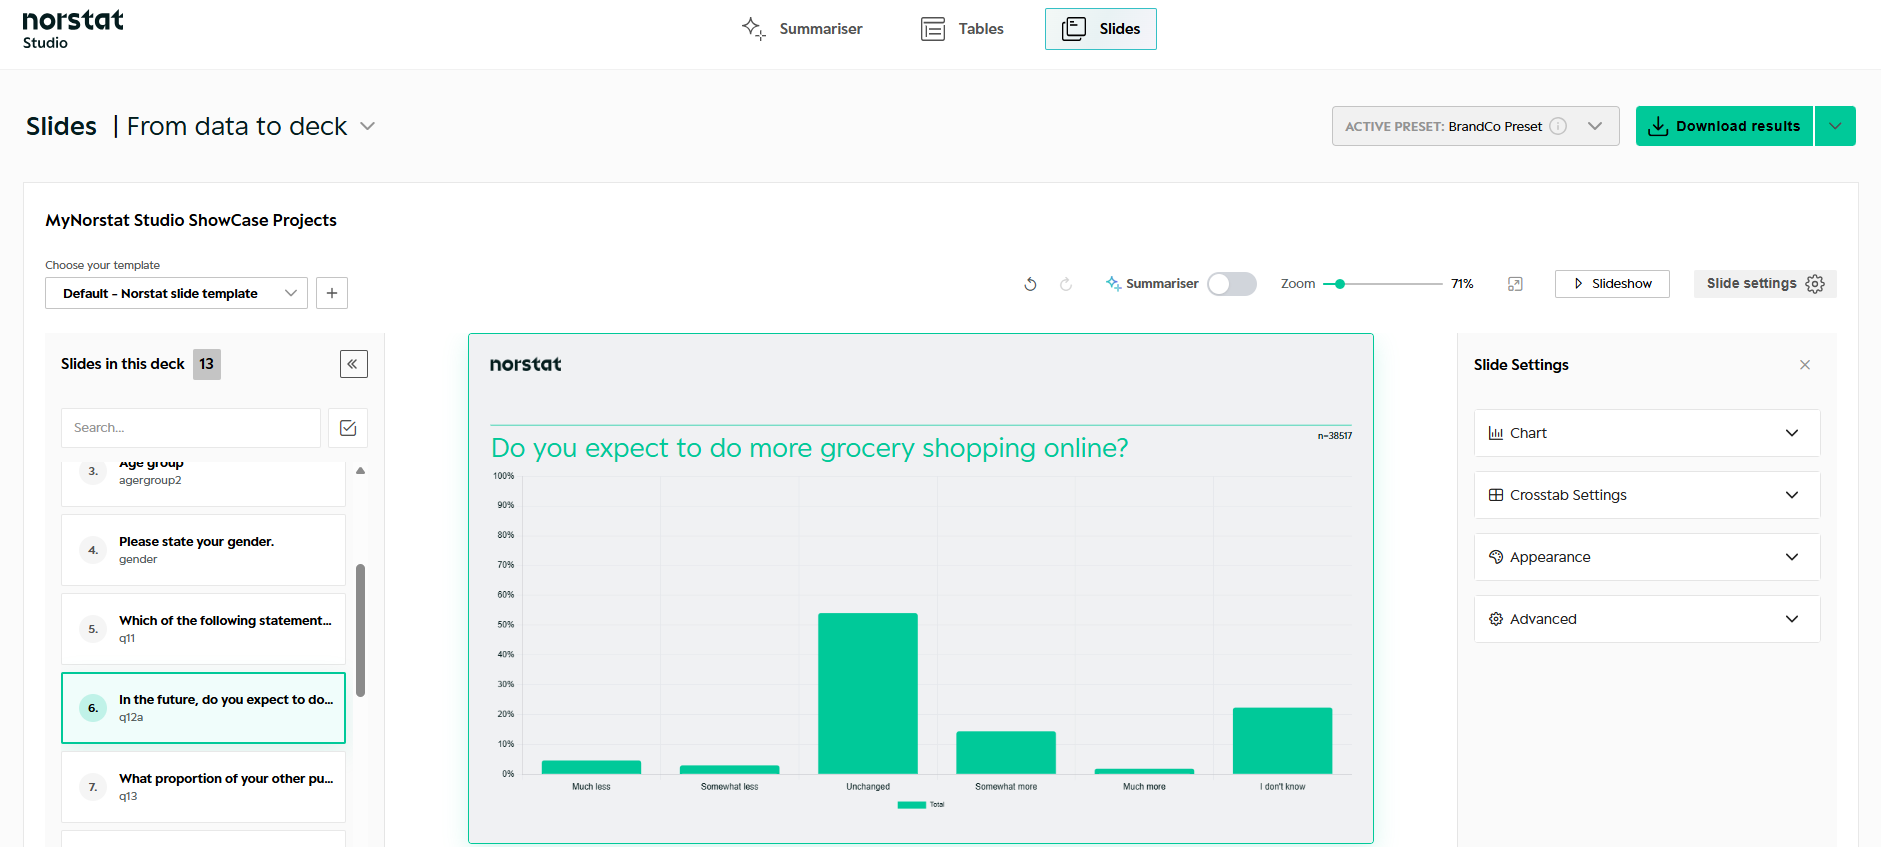
The Slides view consists of three main areas
Slide Deck overview – slide list based on survey questions
Main canvas – the active slide
Slide Settings – Slide Settings for charts, crosstabs, appearance, summariser and advanced options
Slide Deck overview
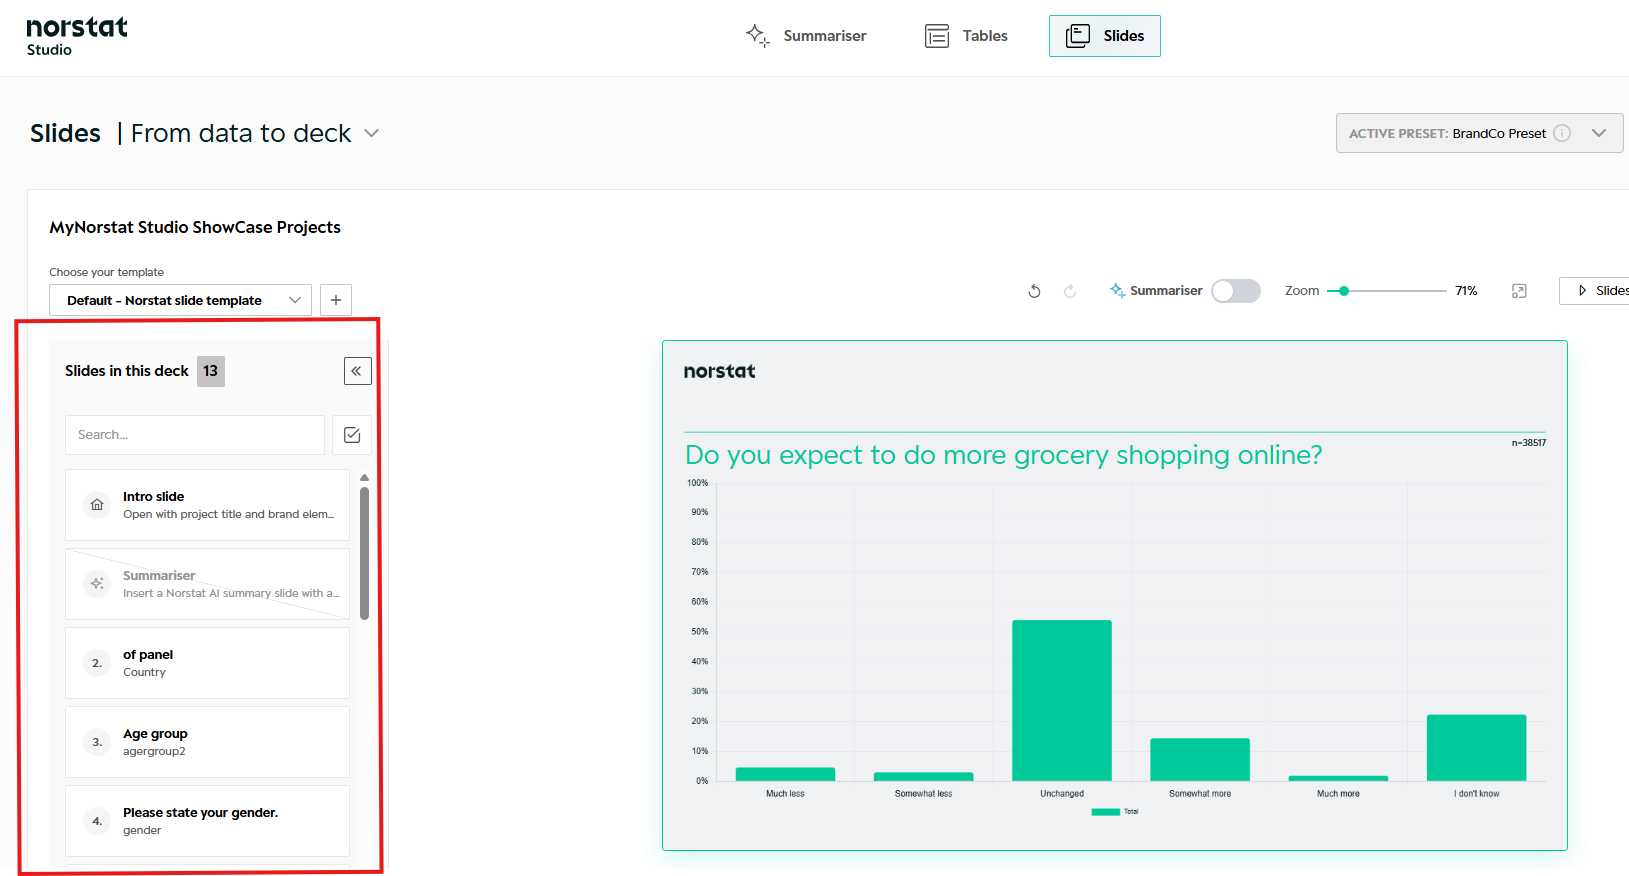
The left panel shows all slides in the deck. Each slide corresponds to a survey question – similar to Tables.
From here you can:
Navigate between slides
Search for specific questions
Hide slides from the final deck
Duplicate slides to create alternative versions
The slide list always reflects the question structure of the survey.
Slide Settings
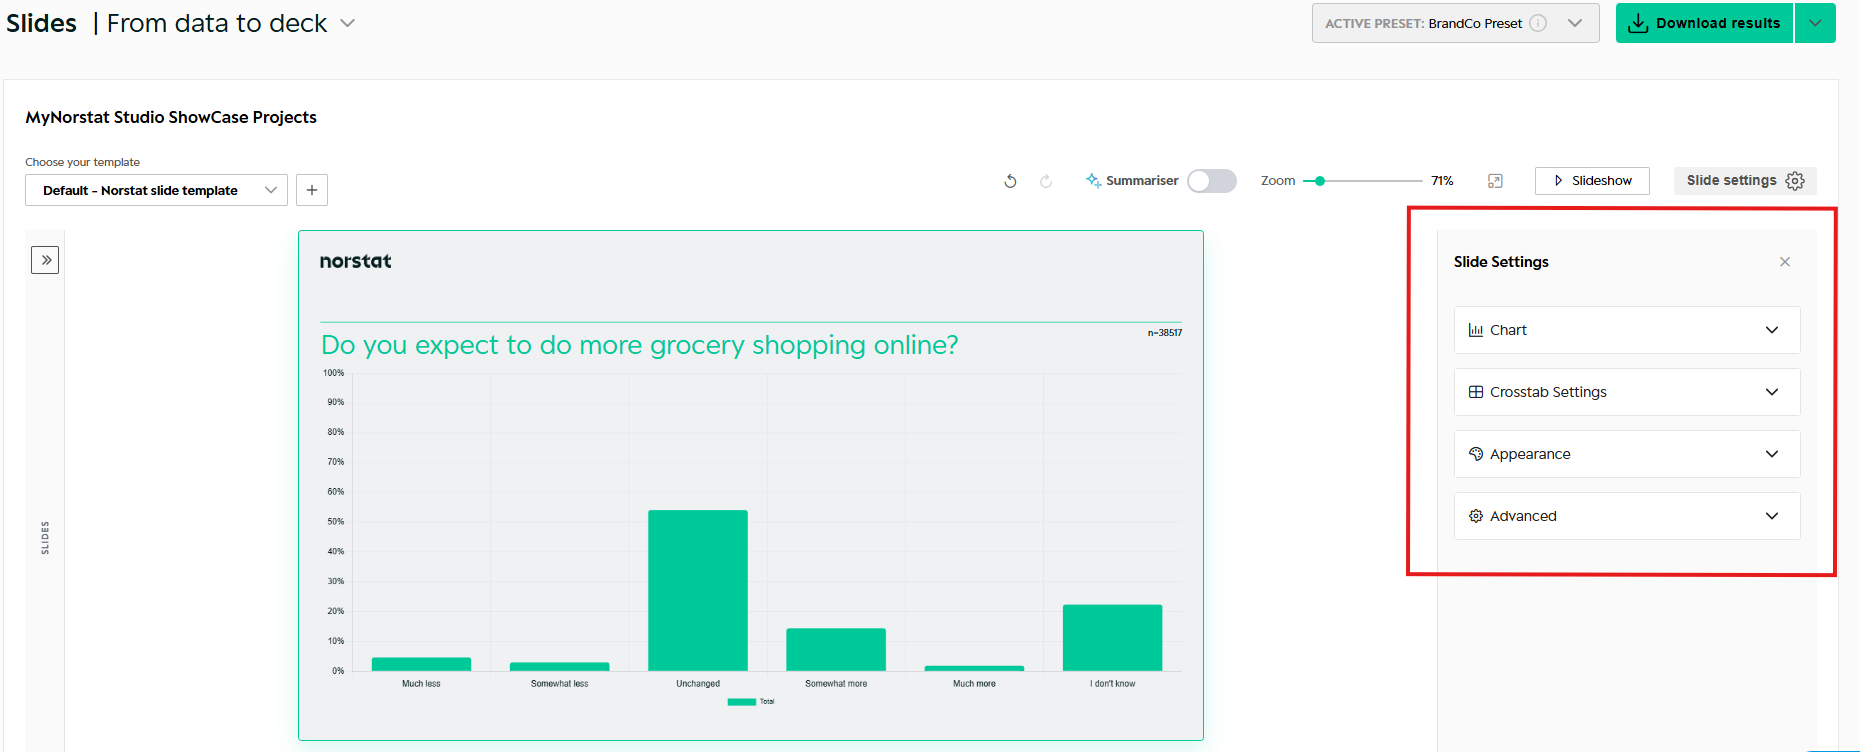
In Slide Settings, you are able to make changes to each slide. All changes you make are reflected instantly, allowing you to see exactly how your changes impact the Slides.
The settings can be applied to one slide or all slides.
Chart
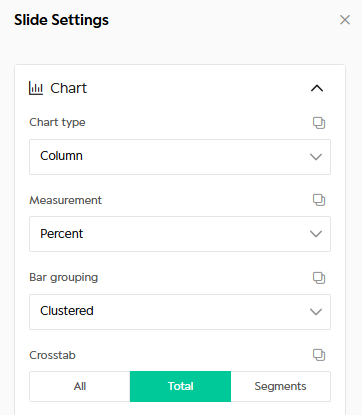
- Chart type: Choose which chart type to use.
- Measurement: Choose between percent and count
- Bar grouping: Visualise your chart clustered, Stacked or Percent stacked. Different options may apply to each Chart type.
- Crosstab: Control how data is broken down in the slide. Segments correspond to Headers from Tables
- All: Include total & headers in the chart
- Total: Only show the total - no headers
- Segments: Only show the headers
Settings can be applied to one slide or all slides.
Crosstab Settings
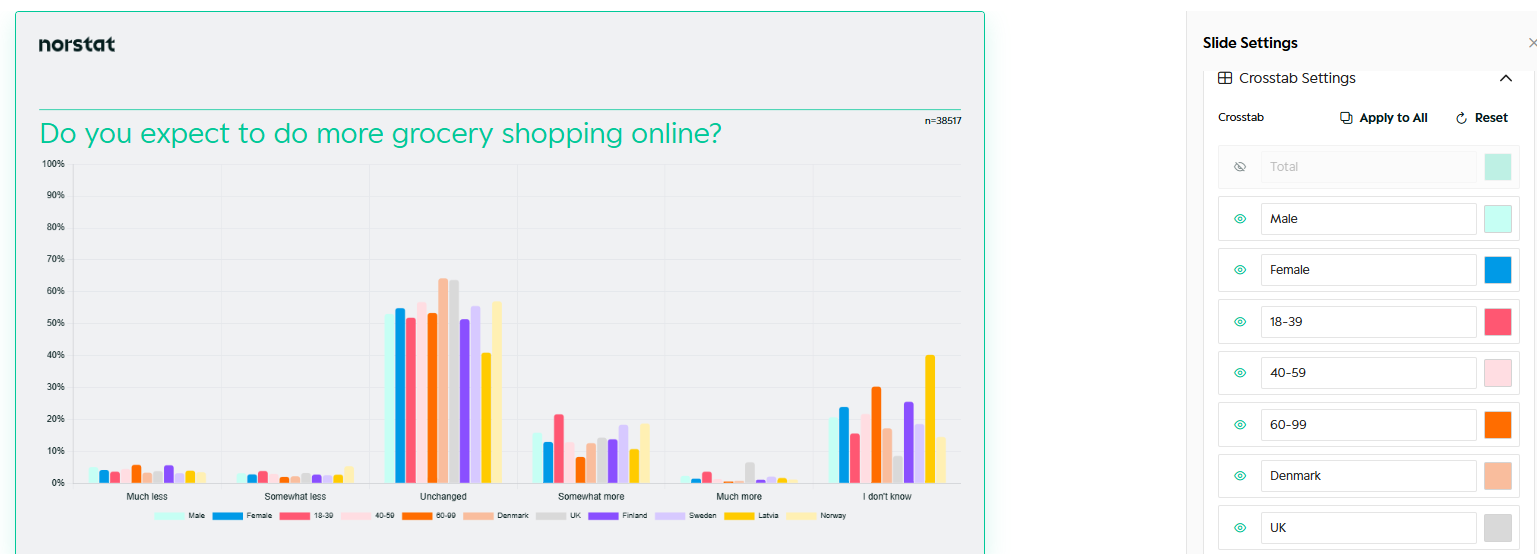
In this setting, you are able to work on your crosstab settings in the cart. You can do the following changes.
- Hide specific segments in crosstab
- Change colours
- Change name
Appearance
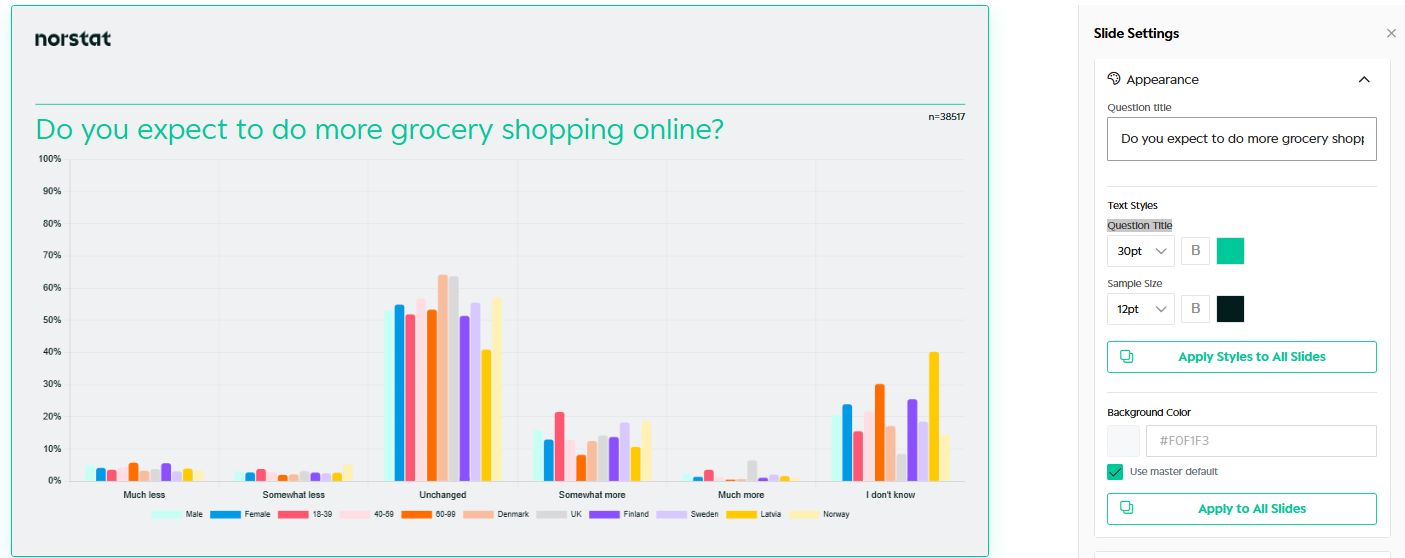
Use Appearance to control the visual look of the slide.
You can:
- Edit the question title
- Adjust font sizes and text styles
- Change background colour
- Apply styles to a single slide or all slides
This is typically used for fine-tuning individual slides.
Advanced settings
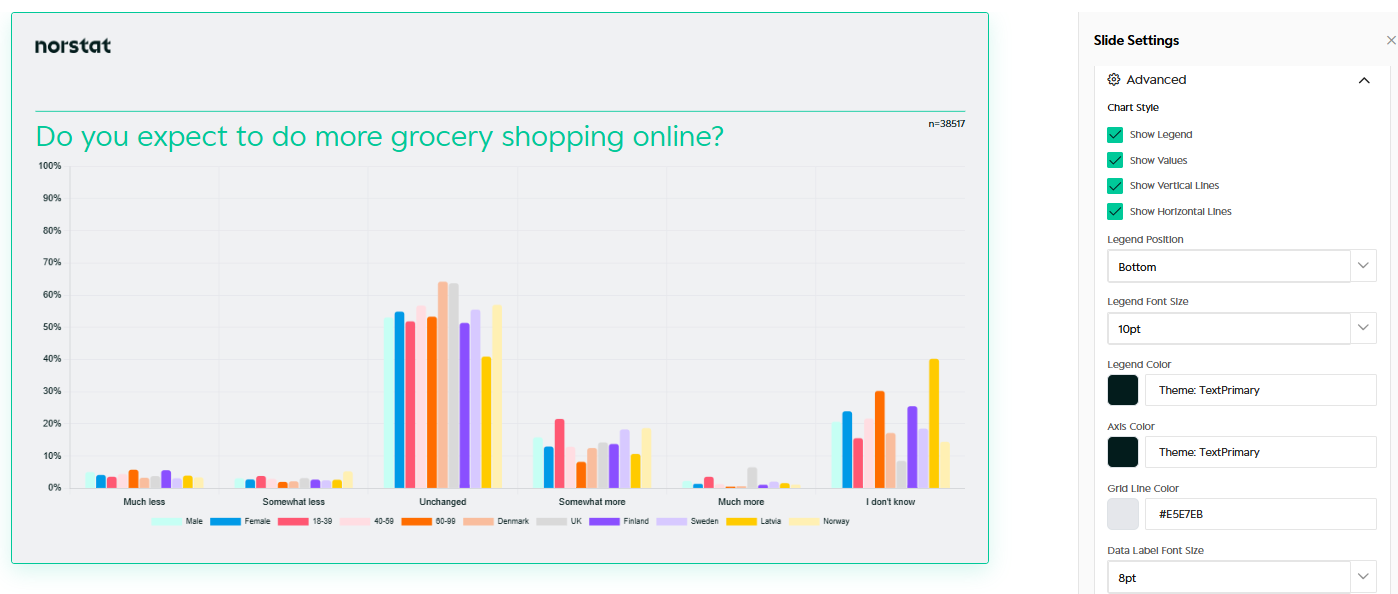
Advanced settings let you fine-tune the chart in your presentation.
Options include:
- Show or hide legend
- Show values
- Control grid lines
- Adjust axis and label styling
Use this when preparing slides for external reporting or presentations.
Transpose
Transpose lets you flip rows and columns on any slide in one click - the same way it works in Tables.
Read your data the way that tells the story. Any transpose applied in Tables is automatically reflected in Slides. You can also transpose directly from the slide view.
From this
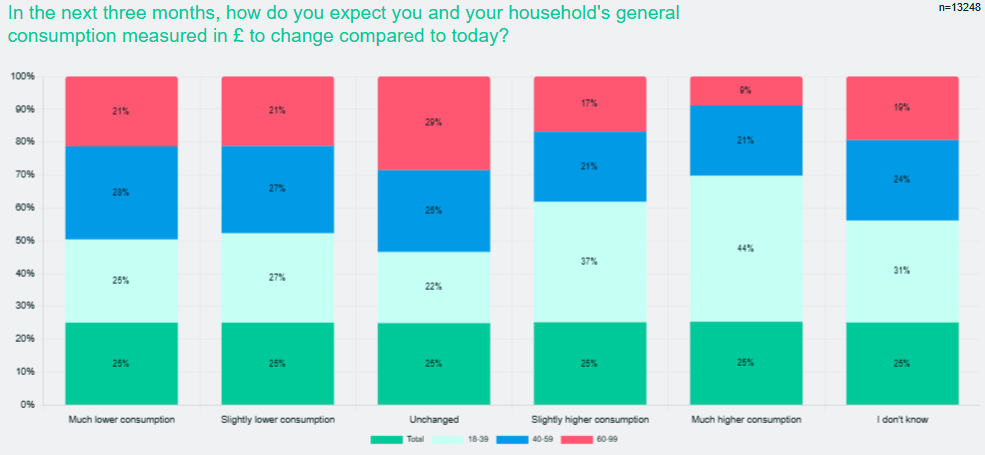
To this
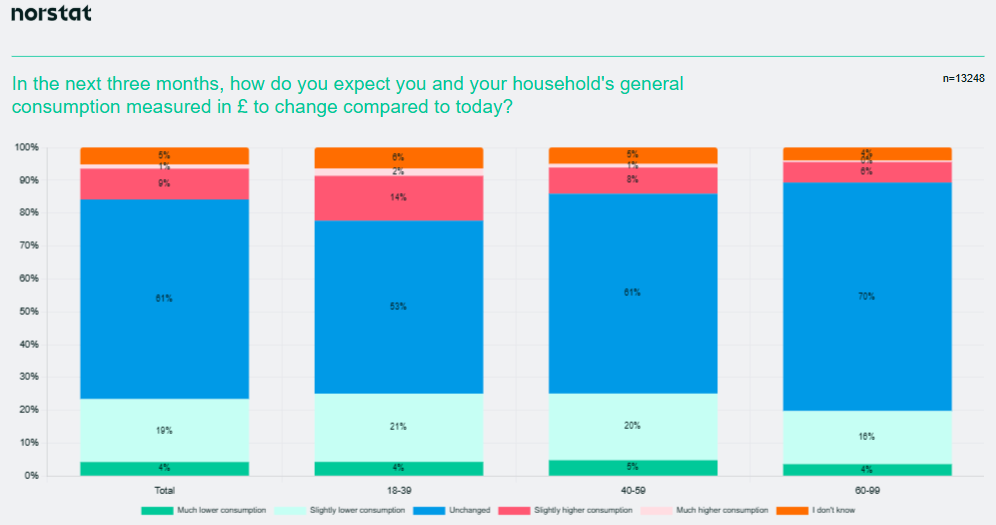
How to transpose in Slides:
- Find the slide you want to transpose
- Go to Slide settings --> Crosstab Settings
- Click "Swap rows and columns"
- Rows and columns are instantly swapped
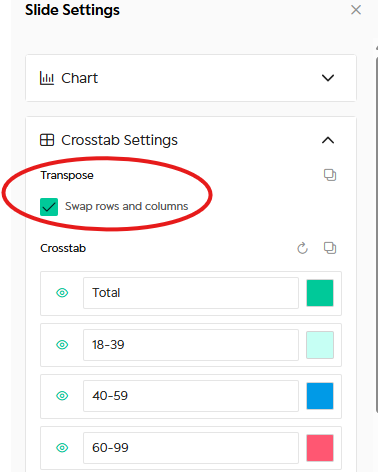
No re-run needed. You can flip back at any time.
Summariser
This setting only applies, if you have turned on Summariser
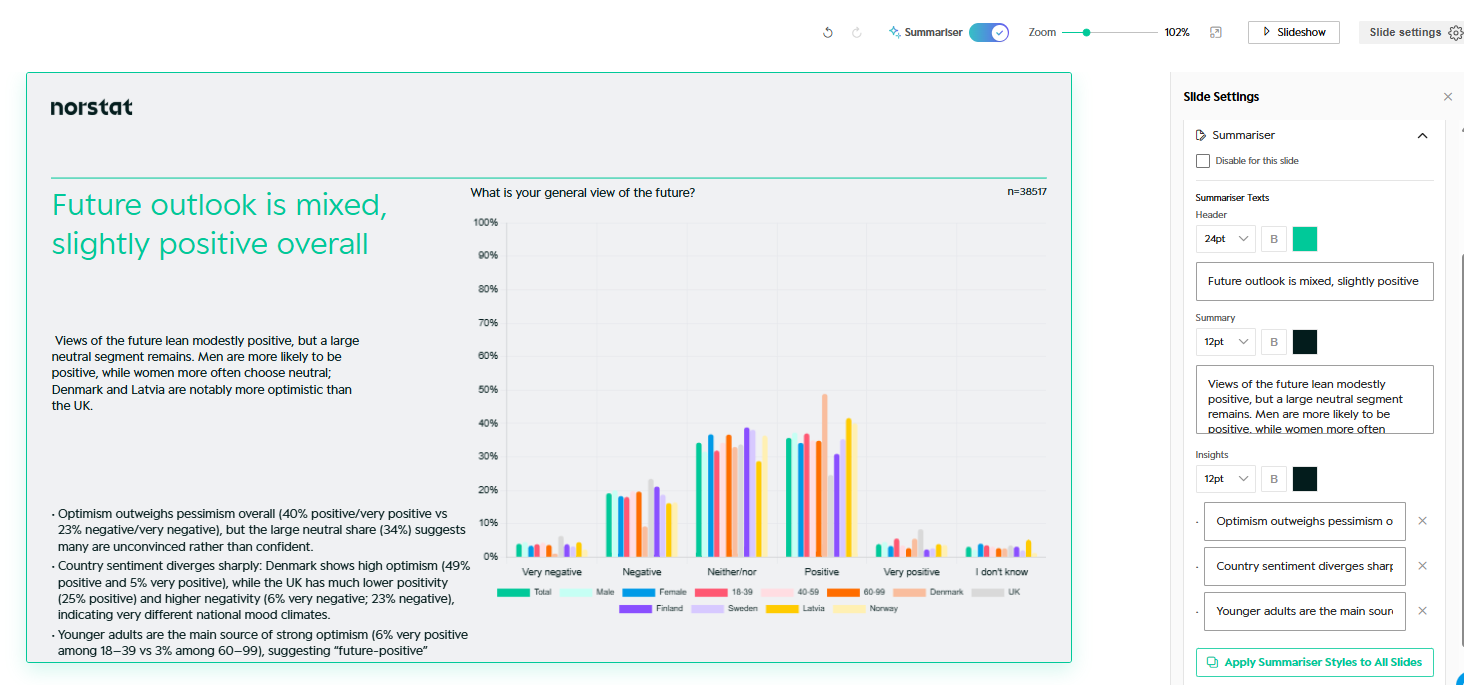
Each text element can be edited directly in Summariser Settings.
You can:
Disable Summariser for the slide
Edit the Header text
Adjust the Summary text
Add, remove, or rewrite Insights
Changes are applied instantly to the active slide. Styling can be applied to all slides.
Slide Master
Slide Master lets you define a reusable slide template with your brand settings.
Use it to ensure consistent layout, colours, fonts, and logo placement across all projects.
When to use Slide Master
Use Slide Master if you:
- Want consistent branding across decks
- Work with multiple projects or recurring reports
- Need full control over typography and colours
Creating a new Slide Master
To create a new Slide Master:
- Click New Slide Master
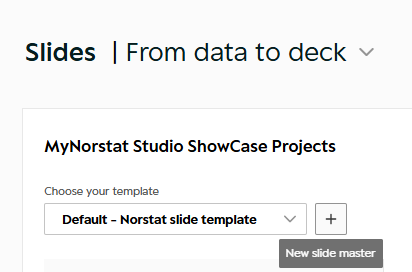
- Choose Guided setup
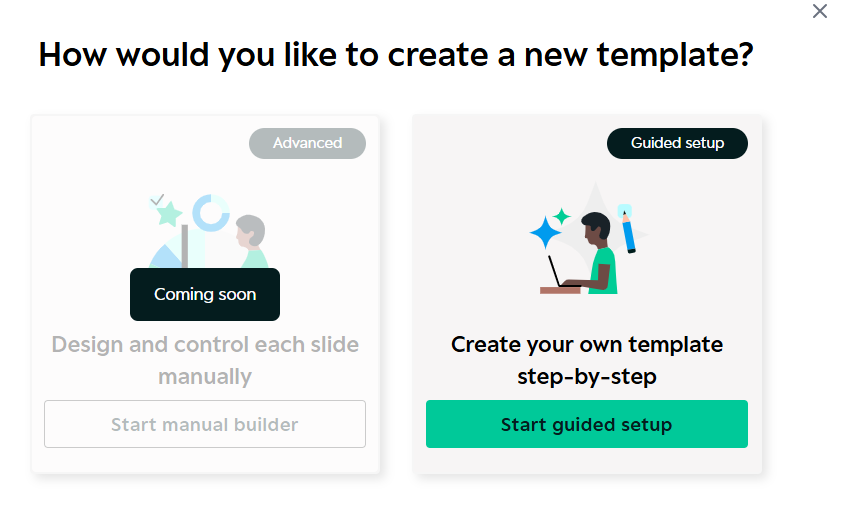
The guided setup walks you through four easy steps.
Step 1: Basics
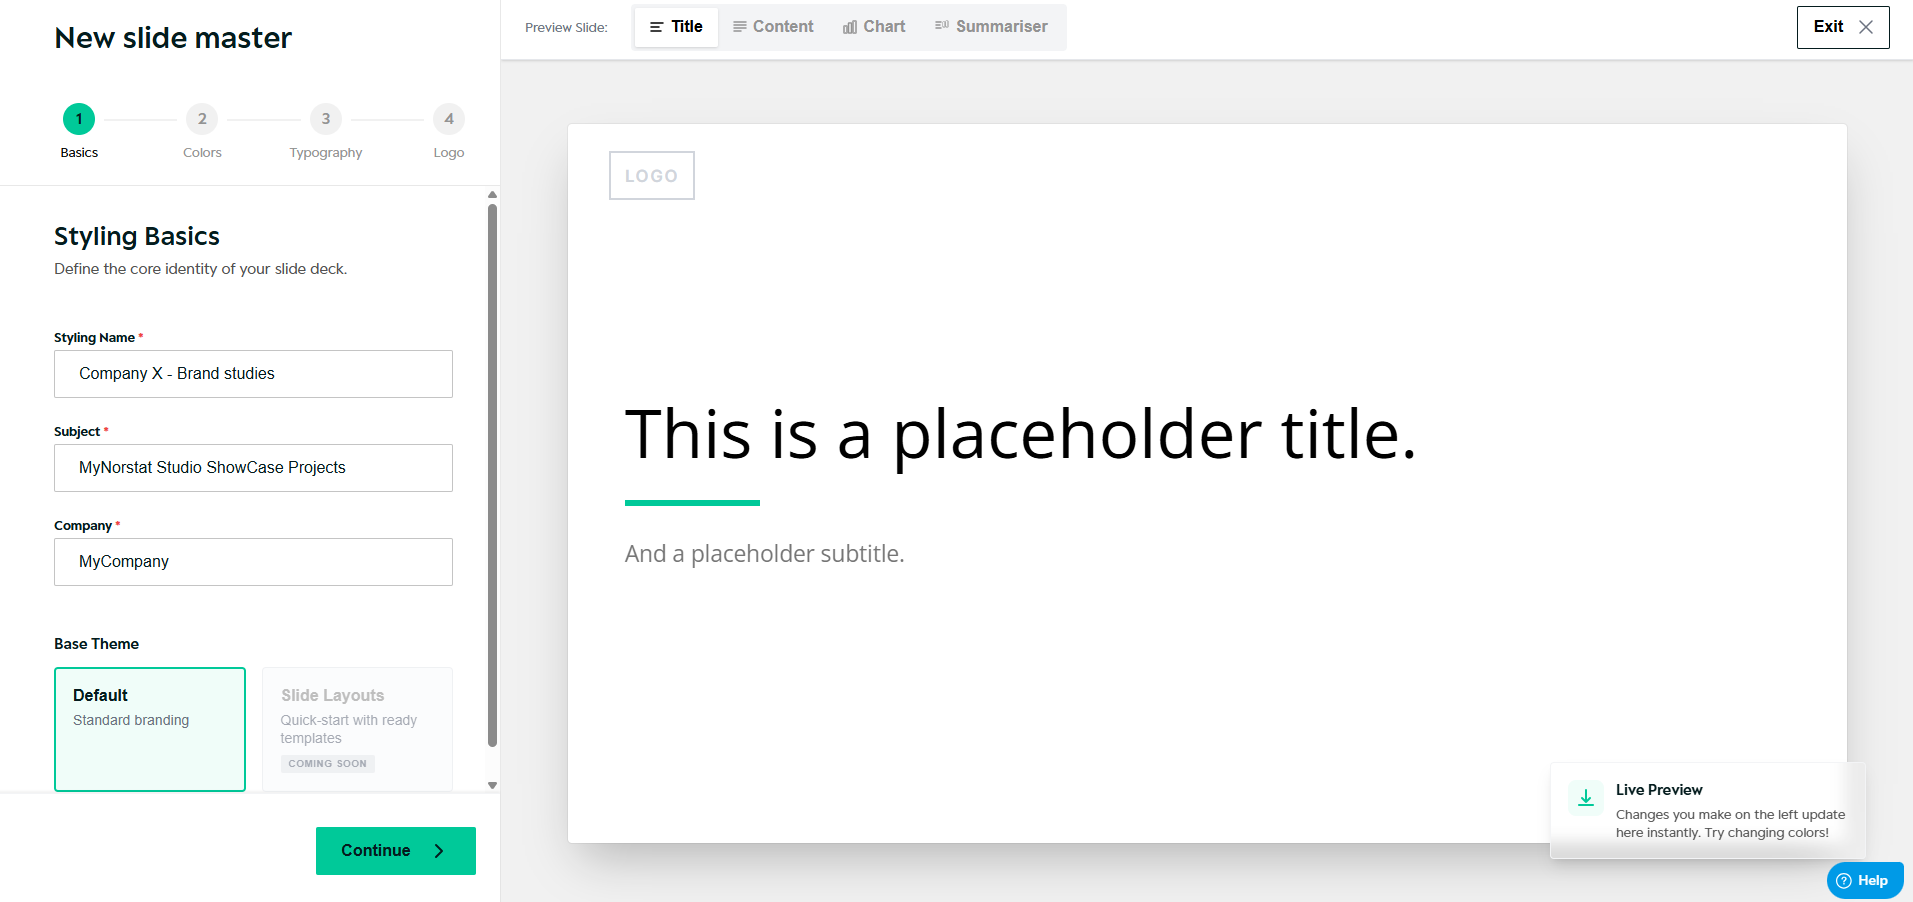
Define the basic structure of your template:
- Template name
- Default layout previews (Title, Content, Chart, Summariser)
You can preview how different slide types will look as you configure the template.
Step 2: Colors
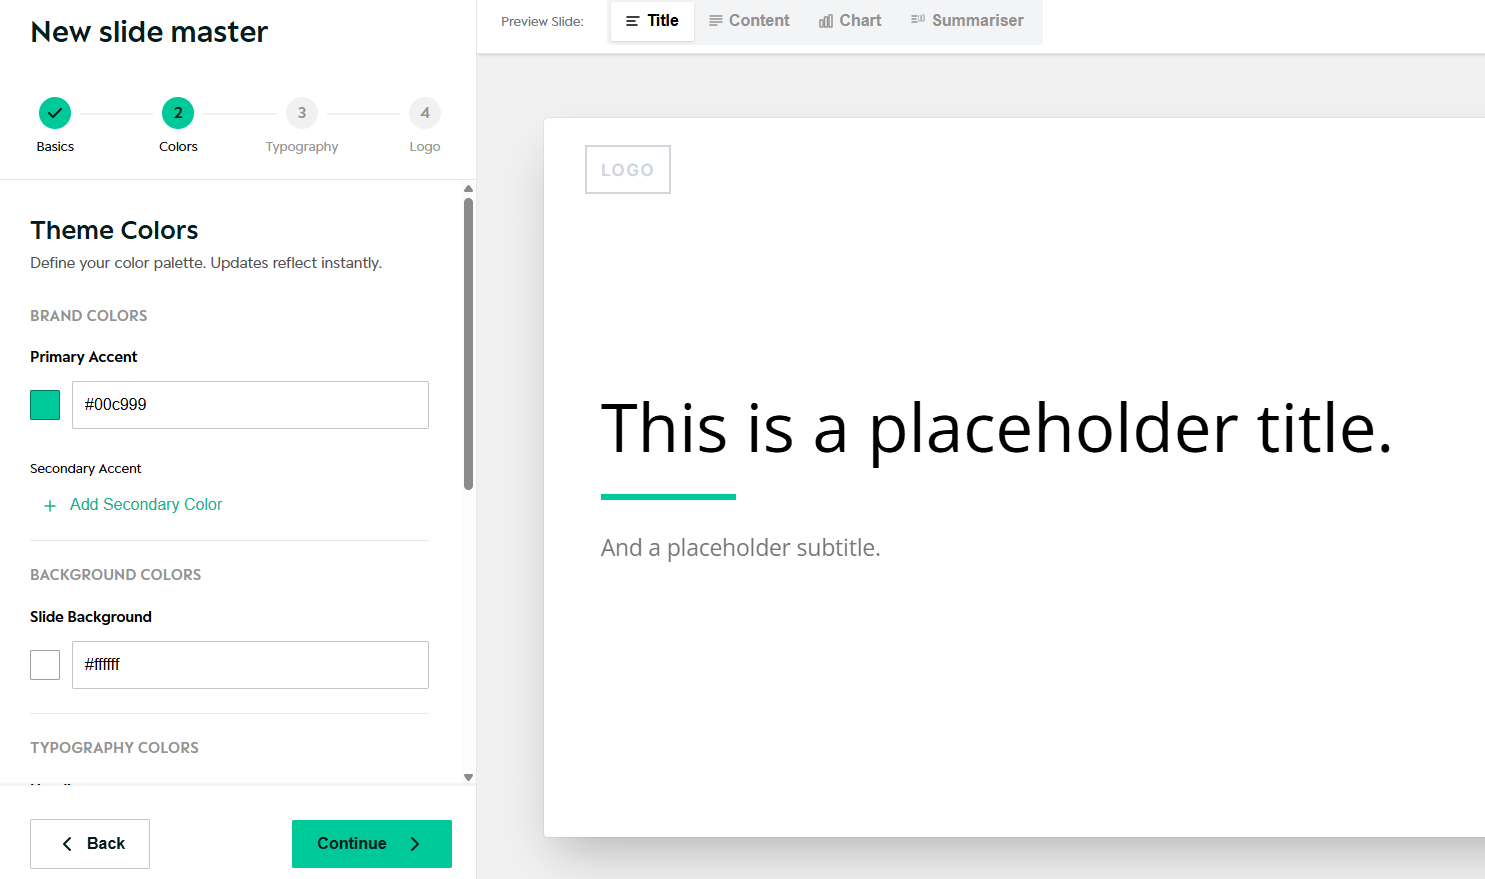
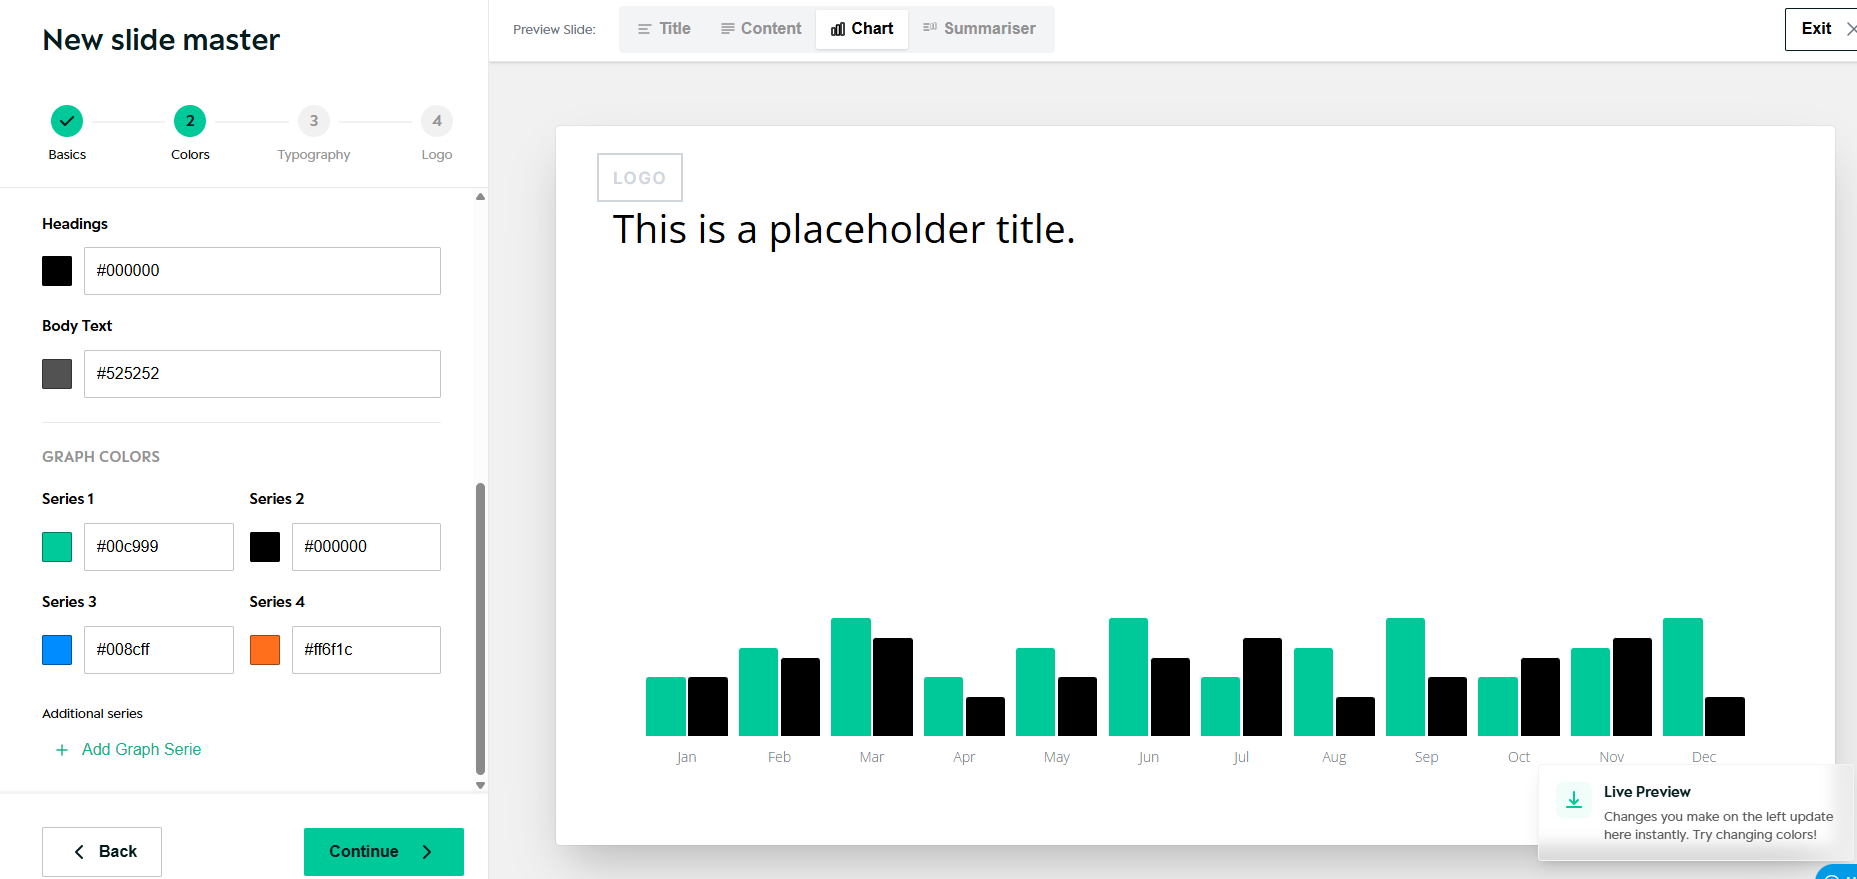
Define your brand colours - insert any hex code. Following things can be changed:
- Primary and secondary colours
- Chart colours
- Background colours
- Headings
- Body Text
Changes are reflected immediately in the live preview.
Step 3: Typography
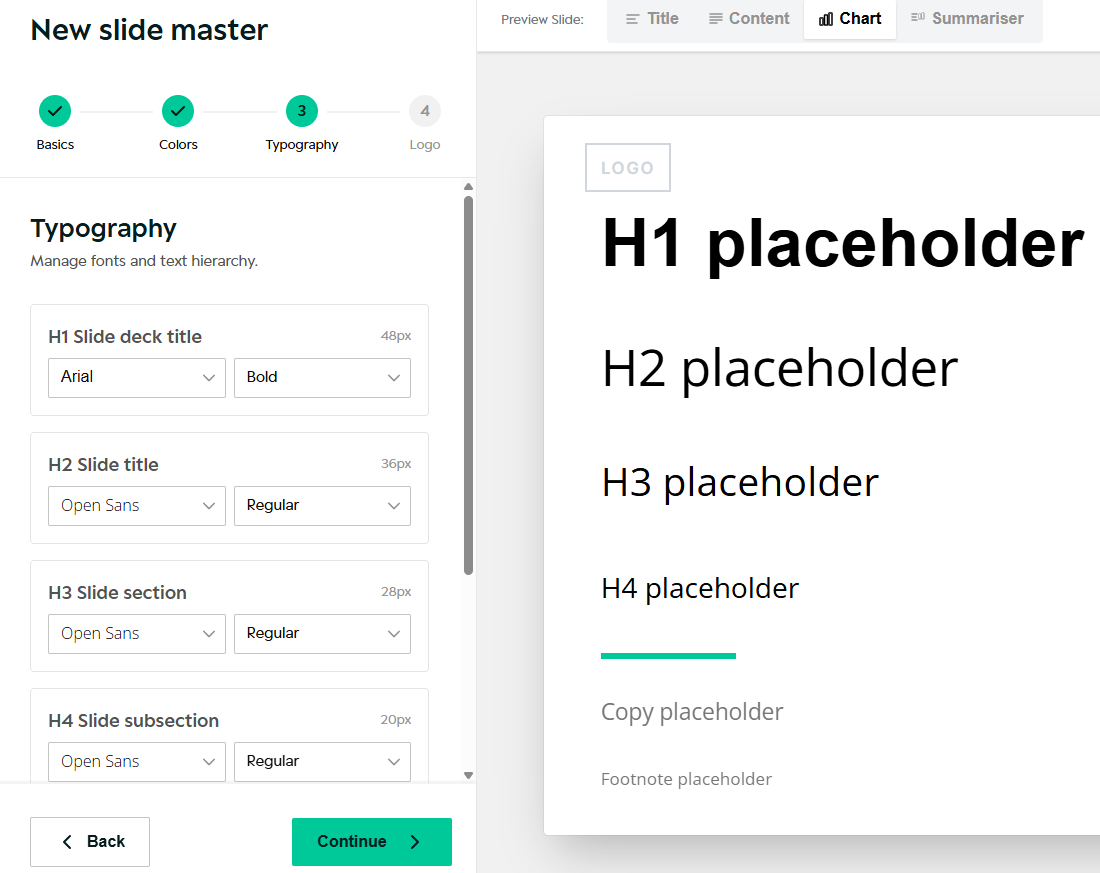
Manage fonts and text hierarchy for:
- H1 slide titles
- H2 slide titles
- Sections and subsections
- Body copy and footnotes
This controls how text appears across all slides.
Step 4: Logo & placement
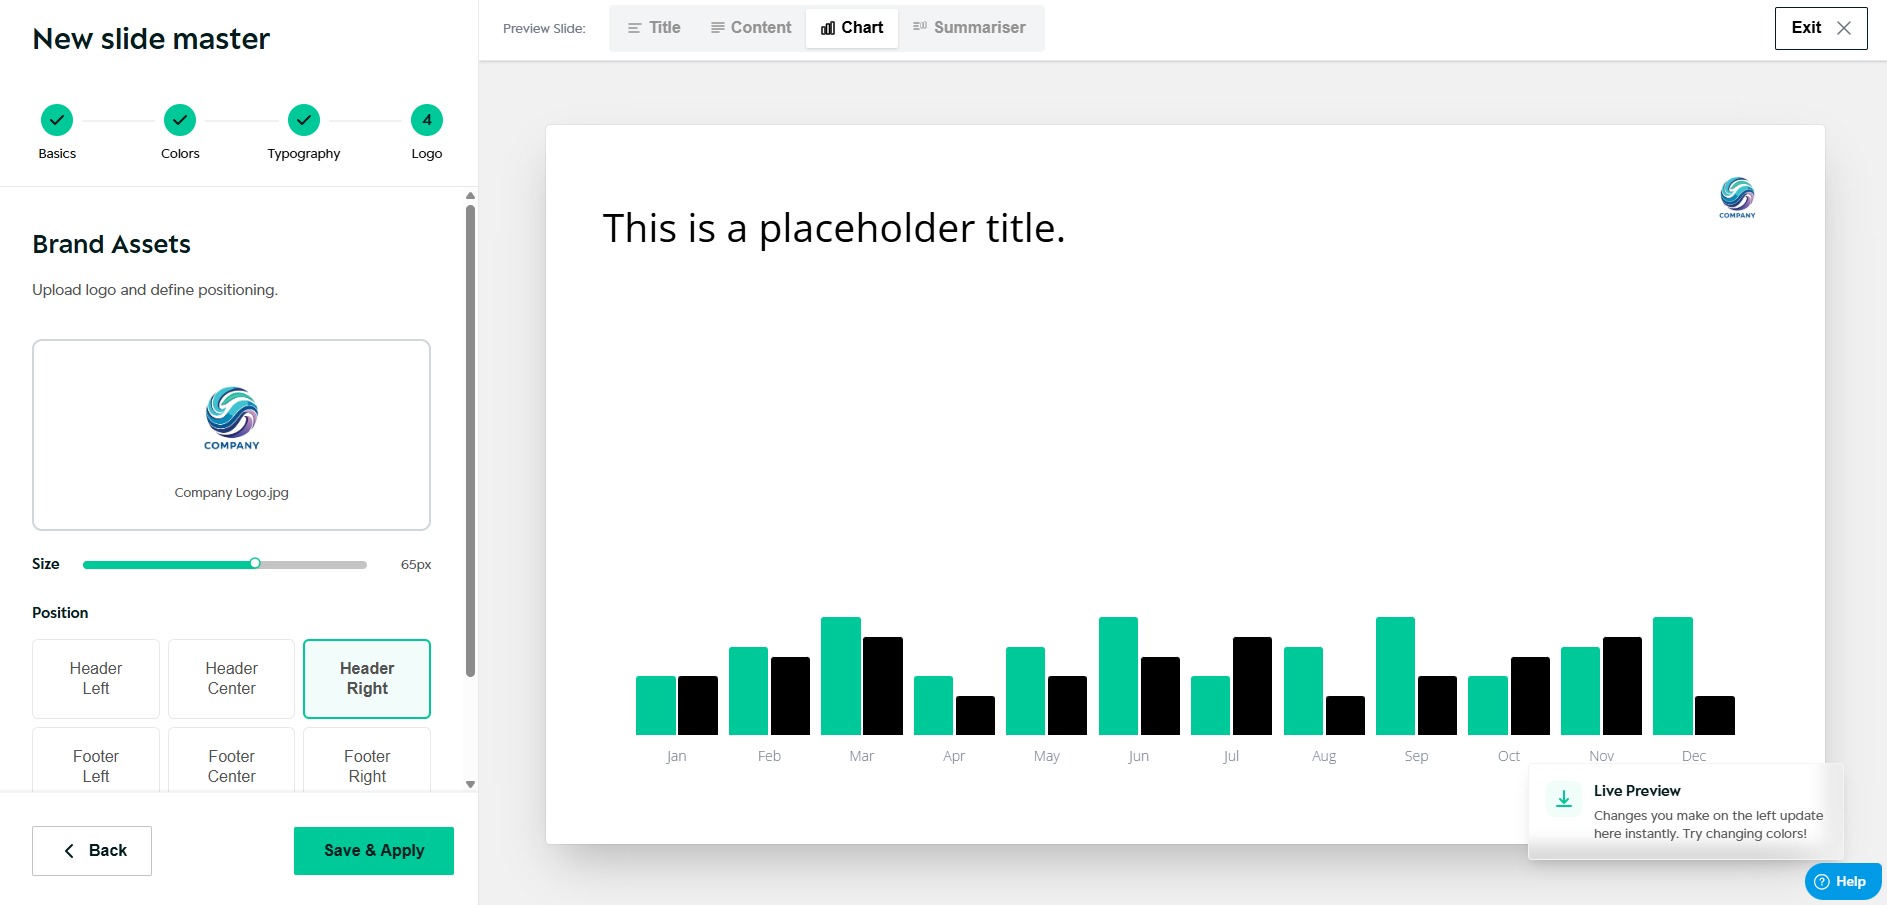
Upload your logo and define placement:
- Header or footer
- Left, centre, or right alignment
- Logo size
You can apply the logo to all slides automatically.
Applying and reusing templates
Once saved:
- The Slide Master becomes available in Slides
- It can be reused across projects
- All slides using the template stay consistent
This ensures brand-safe, scalable reporting.
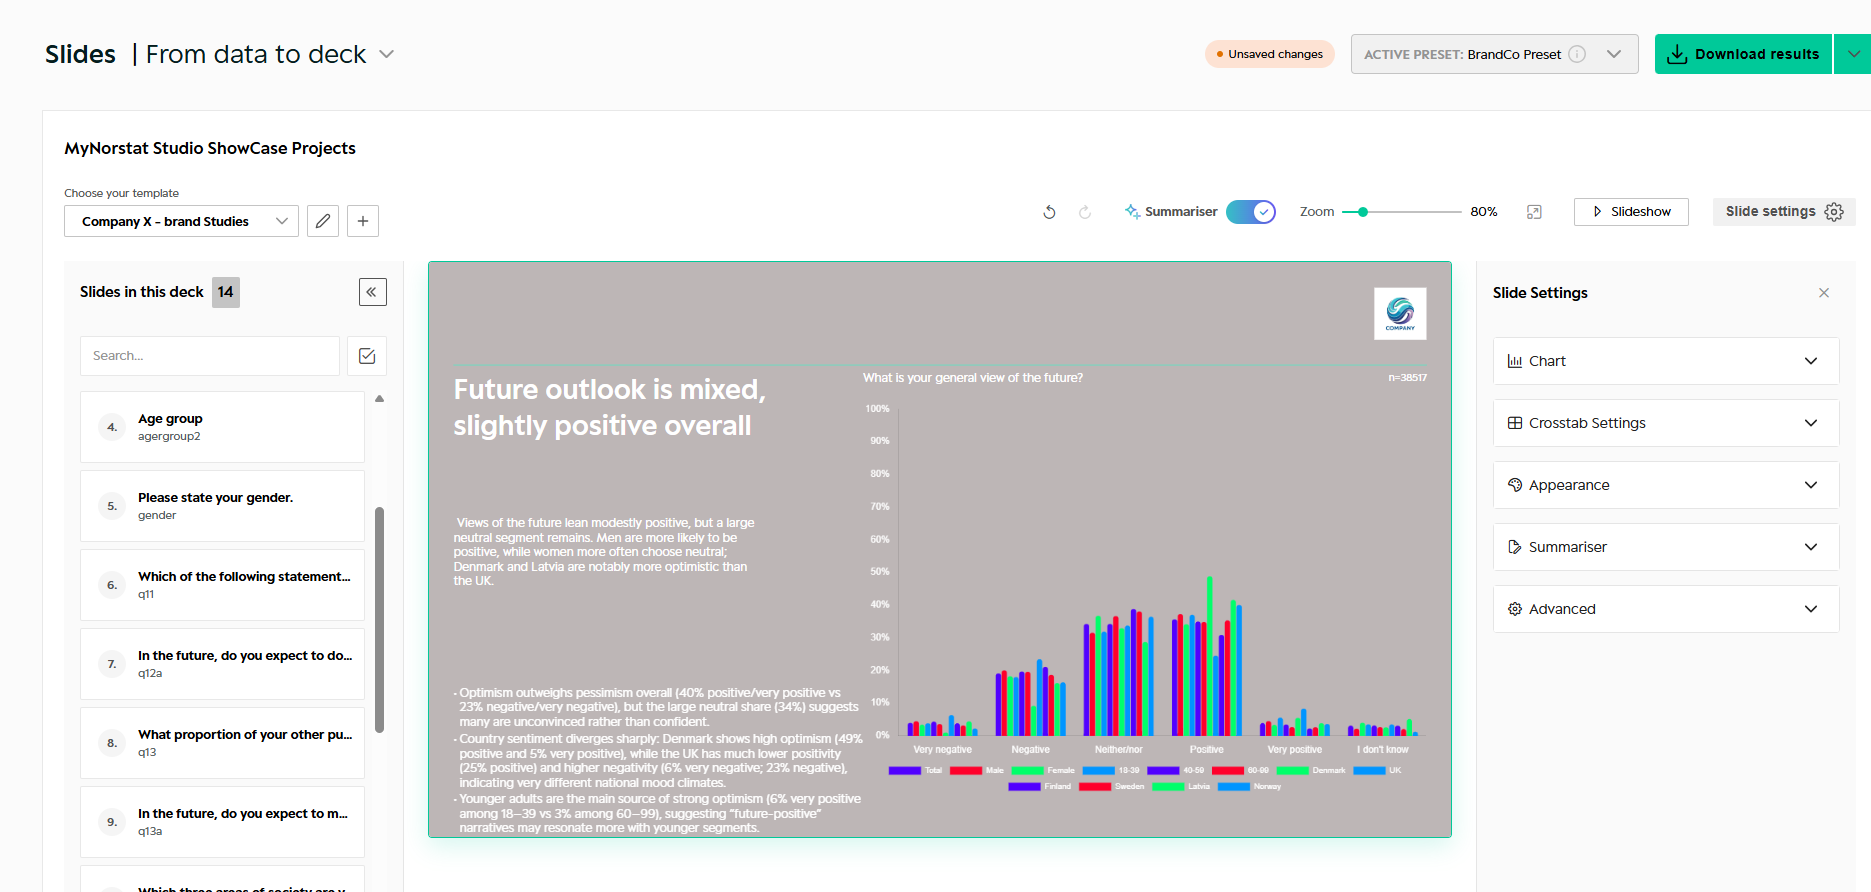
Downloading results
From the top right corner, you can download your deck.
Available options:
- Download Slides – exports the current deck as PowerPoint
- If slides were previously edited, the latest version is used
What you download always matches what you see in Studio and all charts are always native meaning you can edit styles further in your PowerPoint locally.
Import your deck from PowerPoint
You can now import an existing PowerPoint directly into Studio and use it as your Slide Master. Studio reads your colours, fonts, logo and masters automatically - giving you a presentation-ready template without starting from scratch.
When to use Import
Use Import if you:
- Already have a branded PowerPoint template you want to reuse
- Want Studio to detect your brand settings automatically
- Need to get up and running quickly without manual setup
How to import a PowerPoint template:
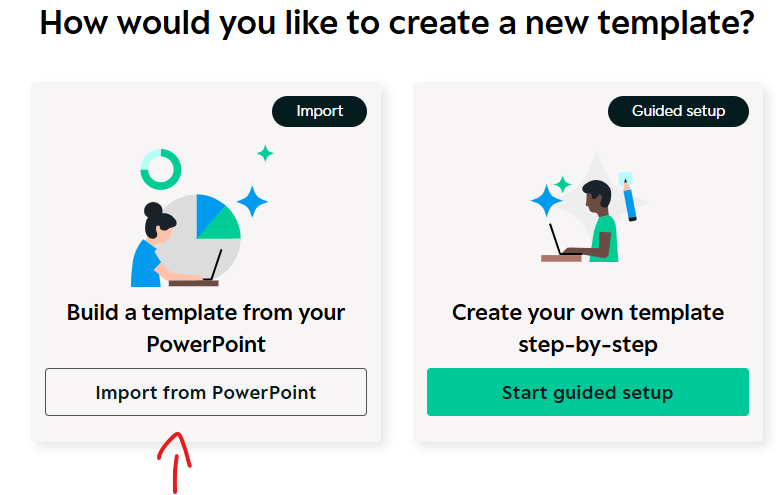
- Click New Slide Master
- Select Import
- Click Import from PowerPoint and upload your file
- Studio reads your colours, fonts, logo and masters and presents them for review
Reviewing your imported template
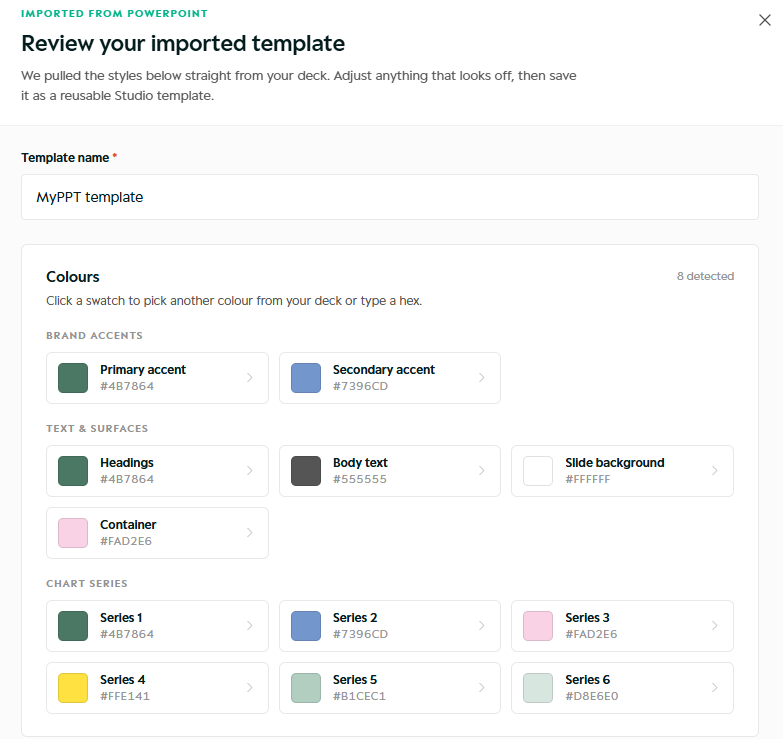
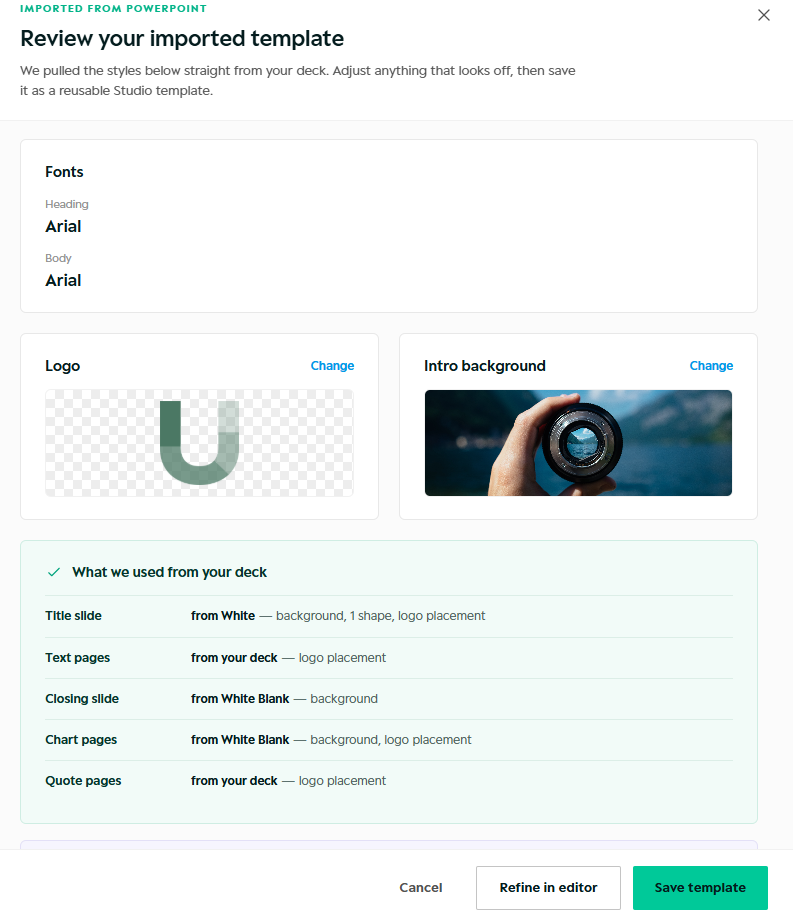
After importing, Studio shows you everything it detected from your deck - organised by brand accents, text and surfaces, and chart series colours. You can:
- Review and adjust any colour by clicking a swatch
- Change fonts for headings and body text
- Update your logo or intro background
- See which masters were detected and how they map to Studio slide types
Saving your template
Once you are happy with the settings:
- Click Save template to save as-is
- Click Refine in editor to make further adjustments in the full template editor before saving
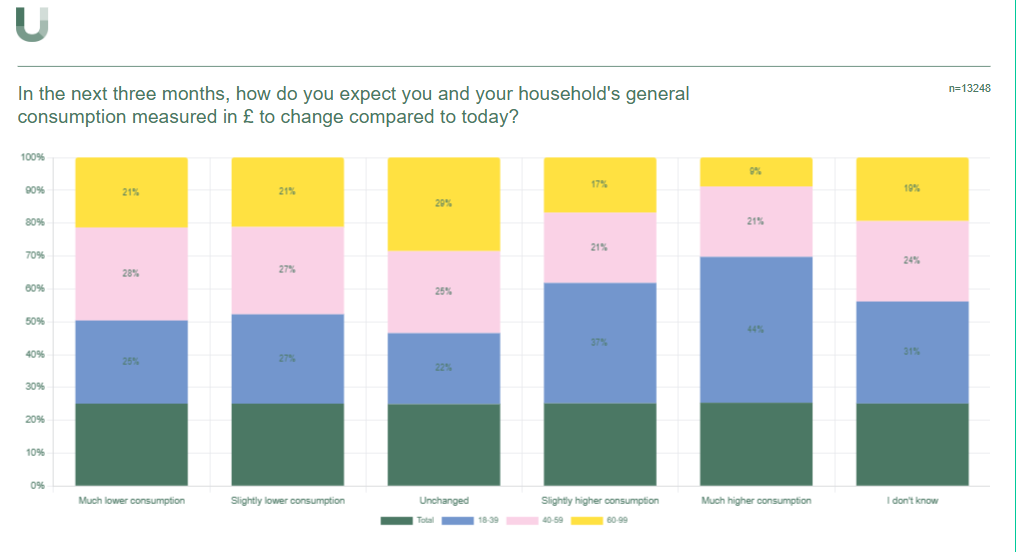
Your imported template is then available as a Slide Master across all your projects.
Was this article helpful?
That’s Great!
Thank you for your feedback
Sorry! We couldn't be helpful
Thank you for your feedback
Feedback sent
We appreciate your effort and will try to fix the article